Installation Guide
General Installation
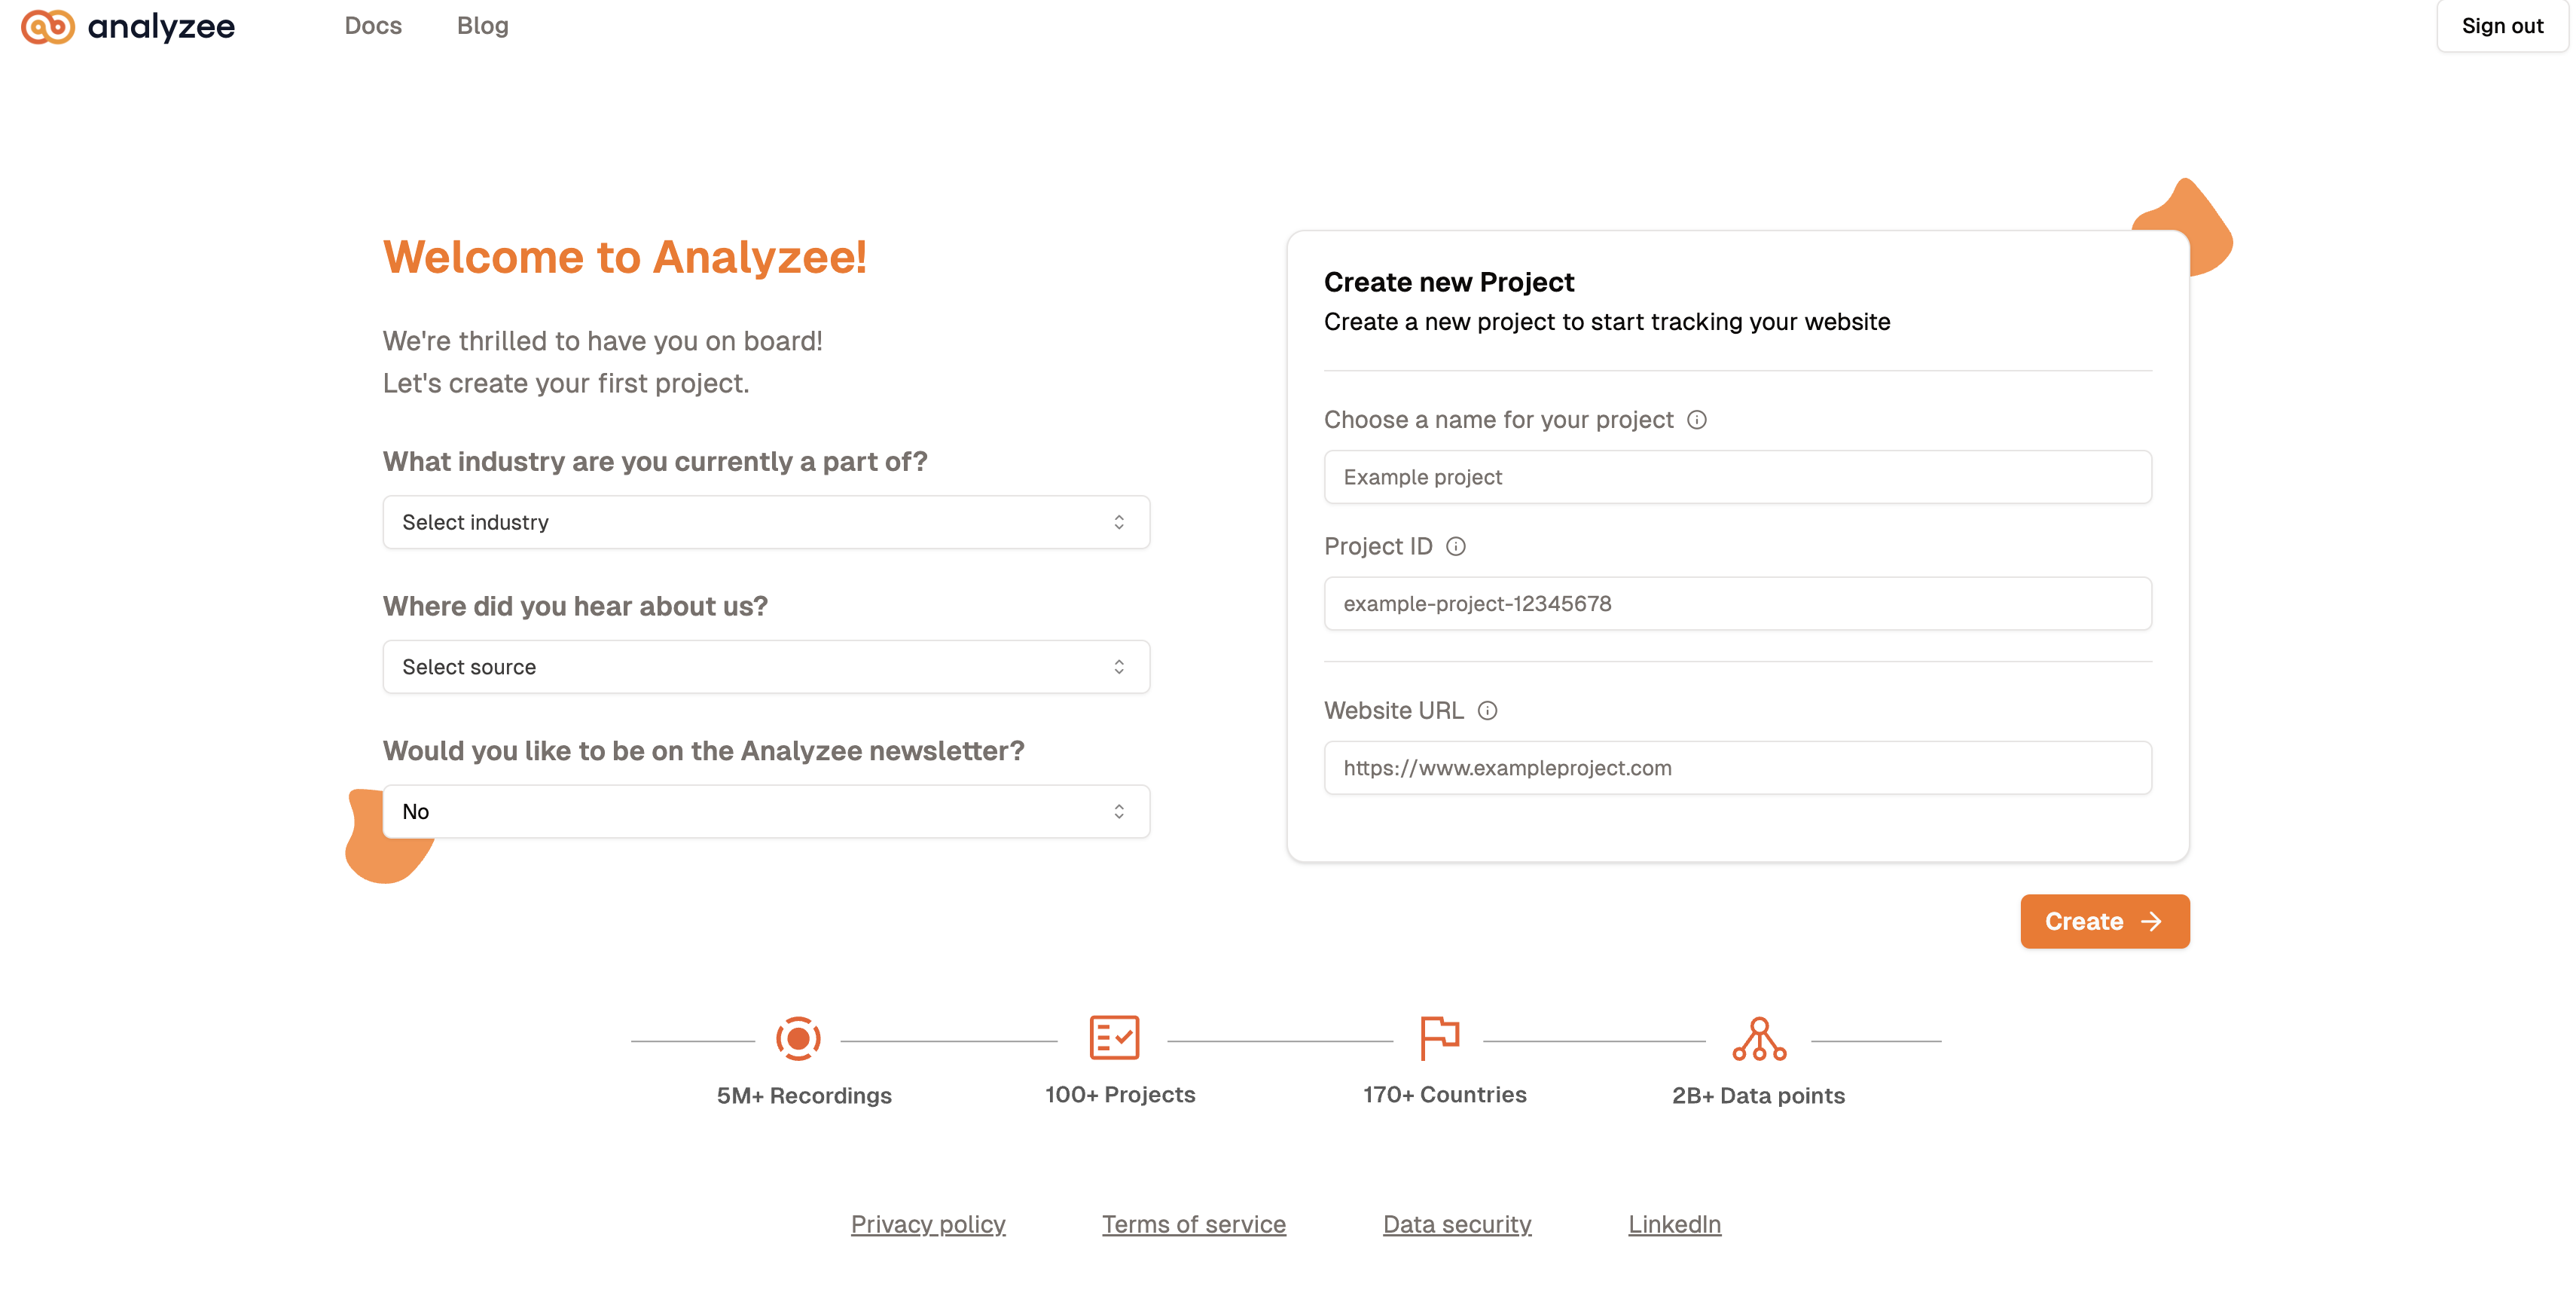
Step 1: Creating a New Project
Let's create a new project, here's how:
- Provide a name for your project.
- Each project is automatically assigned a unique identifier called Project ID, which you can also change if necessary.
- Enter the URL of your website.
- Click Create.
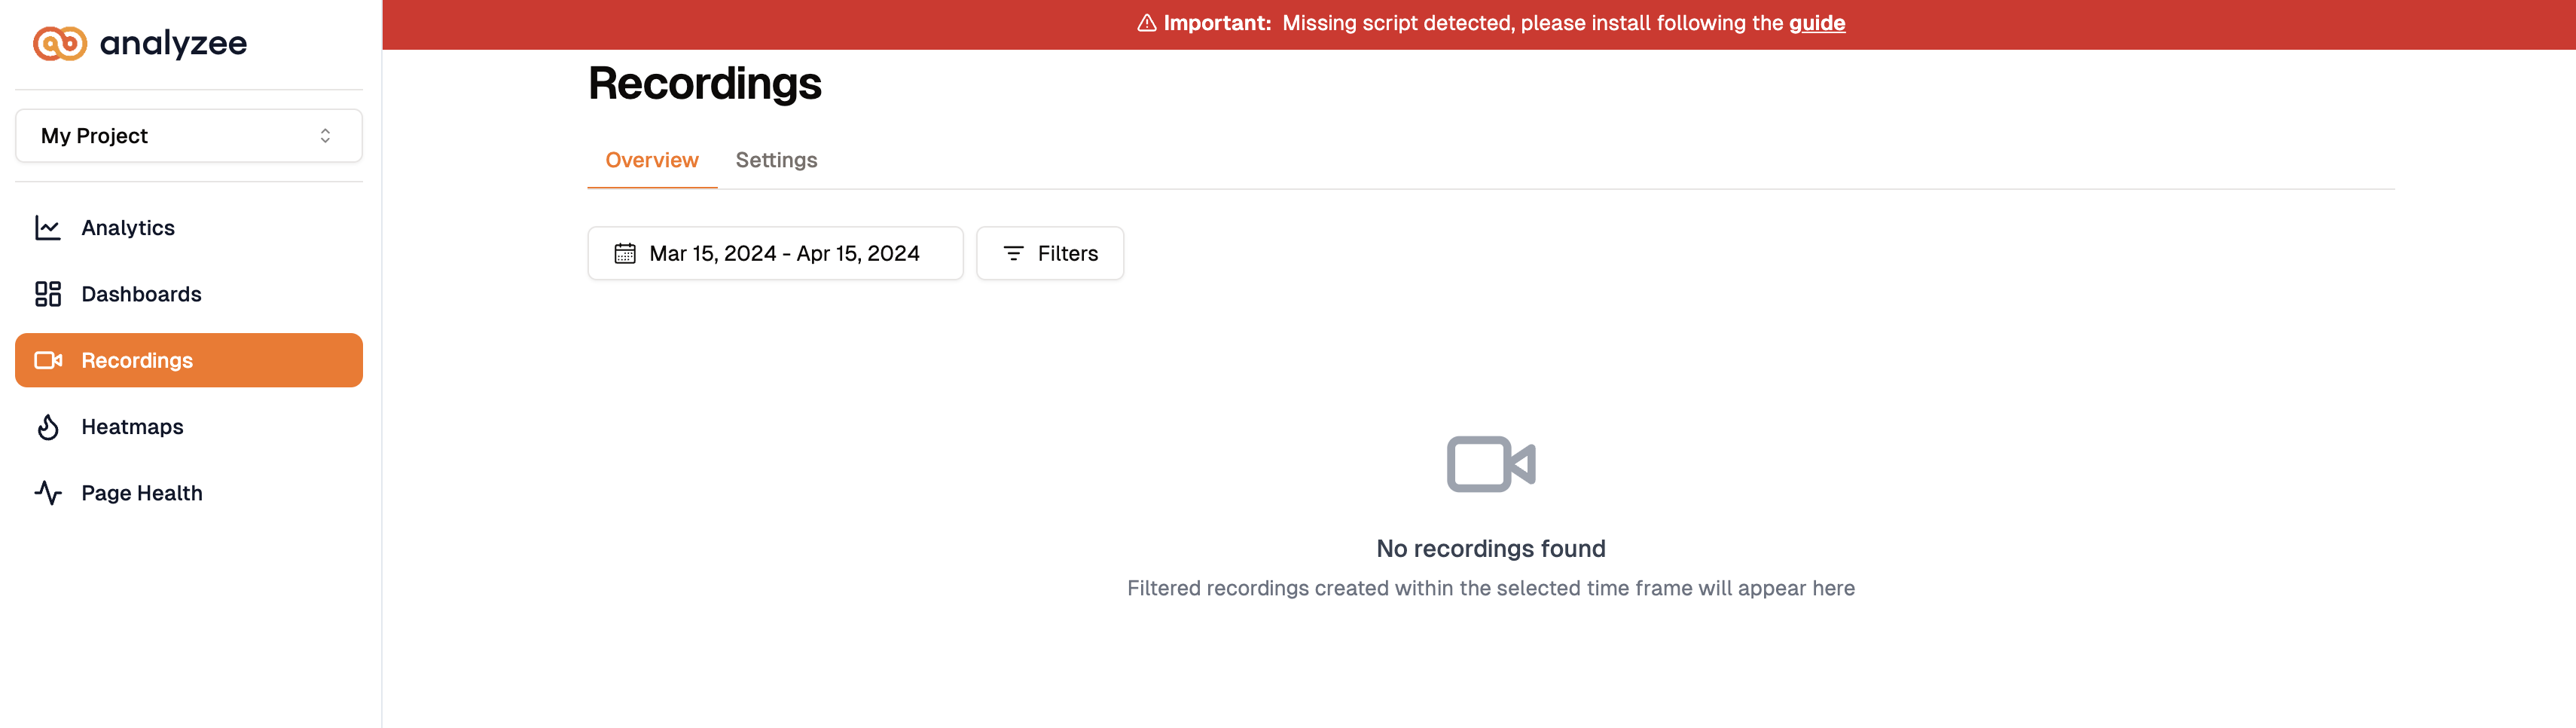
Project Creation
If you have already created a project, but don't have the script, a message will appear on the dashboard indicating that the script is missing.
Step 2: Installing the Analyzee Script
Congratulations! You've successfully created your first project. The next step is to install the Analyzee script on your website. Here's how:
- Copy the provided line of code.
- Paste it into the head section of your website.

Example: Adding the Analyzee Script to your Website Head
As an example, let's consider a Svelte project. The Analyzee script should be added to the head of your website,
typically in the app.html file, as shown below:
<!DOCTYPE html>
<html lang="en">

<head>
    <meta charset='utf-8'>
    <meta name='viewport' content='width=device-width'>
    <title>Docs | Analyzee</title>

    <!-- Analyzee Script -->
    <script async src="https://cdn.analyze.io/sdk/my_custom_id.js"></script>
    <!-- End Analyzee Script -->

  %sveltekit.head%
</head>

<body>
  %sveltekit.body%
</body>
Now, all that's left to do is deploy the website, and you're all set.
What does this script do?
Imagine you're building a website, and you want to use some special tools to understand how people are using it.
This line of code:
<script async src="cdn.analyzee.io/sdk/my_custom_id.js"></script>, is like sending a messenger to a special place (in this case, "cdn.analyzee.io/sdk/my_custom_id.js") to bring back some helpful tools for your website.
The async part means that the messenger can go get those tools without waiting for them to arrive before continuing with other jobs. It's like sending someone to the store to buy groceries while you keep cooking at home.
Once the messenger comes back with the tools (which are actually a set of instructions written in a programming language called JavaScript), they'll help you understand how people are using your website. They might count how many people visit, what pages they look at, or other useful information like that.
So, in simple terms, this line of code is like sending a helper to get some tools to better understand how your website is being used.
What does cdn.analyzee.io/sdk stand for?
A CDN, or Content Delivery Network, is a network of servers distributed in various locations around the world. The main purpose of a CDN is to deliver web content (like images, scripts, stylesheets, etc.) to users more efficiently. When a user visits a website, the content is served from the nearest CDN server, which reduces the loading time and improves the user experience. https://cdn.analyze.io/ is the URL of the CDN. It's the address where the script file is stored. When you include this URL in your website code, the browser knows where to find the script file and load it into your website.
An SDK, or Software Development Kit, is a set of tools, libraries, documentation, and guidelines that developers use to create software applications for a specific platform.
sdk/my_custom_id.js refers to a JavaScript file (my_custom_id.js) that contains tools and functionalities provided by the analyzee.io platform. The my_custom_id part is a placeholder for your unique project ID. Each project on analyzee.io has a unique identifier that is used to load the corresponding SDK file. By replacing my_custom_id with your project ID, you ensure that the correct SDK is loaded for your project.
So, in summary, the line of code you provided loads an SDK (a set of tools) from a CDN (a network of servers) to integrate analyze.io's services into a website.
Specific Installation Guides
Analyzee can be installed on various platforms to analyze your website data and provide valuable insights. Below are the installation guides for specific platforms, such as WordPress, Shopify, Wix, Squarespace, and Webflow. The installation process is similar for each platform, but the steps may vary slightly. If you encounter any issues during the installation process, feel free to contact the Analyzee support team for assistance.

To install Analyzee on your WordPress website, follow these steps:
- Log in to your WordPress admin dashboard.
- Go to Appearance > Theme Editor.
- Find the header.php file in the list of theme files on the right side of the screen.
- Click on the header.php file to open it.
- Paste the Analyzee script code immediately before the closing
</head>tag. - Click the Update File button to save your changes.
- Refresh your website to ensure that the script is working correctly.
- You're all set! The message indicating that the script is missing should no longer appear.
The official WordPress tutorial can be found here.

To install Analyzee on your Shopify website, follow these steps:
- Log in to your Shopify admin dashboard.
- Go to Online Store > Themes.
- Click on the Actions dropdown menu and select Edit code.
- Find the theme.liquid file in the list of theme files on the left side of the screen.
- Click on the theme.liquid file to open it.
- Paste the Analyzee script code immediately before the closing
</head>tag. - Click the Save button to save your changes.
- Refresh your website to ensure that the script is working correctly.
- You're all set! The message indicating that the script is missing should no longer appear.
The official Analyzee Shopify plugin is coming soon! Keep an eye out for updates on our website.

To install Analyzee on your Wix website, follow these steps:
- Log in to your Wix admin dashboard.
- Go to Settings > Tracking & Analytics.
- Click on the + New Tool button.
- Select Custom from the list of tools.
- Paste the Analyzee script code into the Paste the code snippet here field.
- Click the Apply button to save your changes.
- Refresh your website to ensure that the script is working correctly.

To install Analyzee on your Squarespace website, follow these steps:
- Log in to your Squarespace admin dashboard.
- Go to Settings > Advanced > Code Injection.
- Paste the Analyzee script code into the Header field.
- Click the Save button to save your changes.
- Refresh your website to ensure that the script is working correctly.
- You're all set! The message indicating that the script is missing should no longer appear.
The official Squarespace tutorial can be found here.

To install Analyzee on your Webflow website, follow these steps:
- Log in to your Webflow admin dashboard.
- Go to Project Settings > Custom Code.
- Paste the Analyzee script code into the Head Code field.
- Click the Save Changes button to save your changes.
- Refresh your website to ensure that the script is working correctly.
- You're all set! The message indicating that the script is missing should no longer appear.

To install Analyzee on your Docusaurus website, follow these steps:
- Open your Docusaurus project.
- Find the docusaurus.config.js file.
- Add the following code snippet with your custom ID:
 scripts: [
   {
       'https://cdn.analyze.io/sdk/my_custom_id.js',
       async: true
   }
] - Publish your website to apply the changes.
For more information about Analyzee feel free to visit:
Home | Blogs | LinkedIn | Twitter - X
Need help from Analyzee support team? Please contact us via support chat on our website or via email at support@analyzee.io.